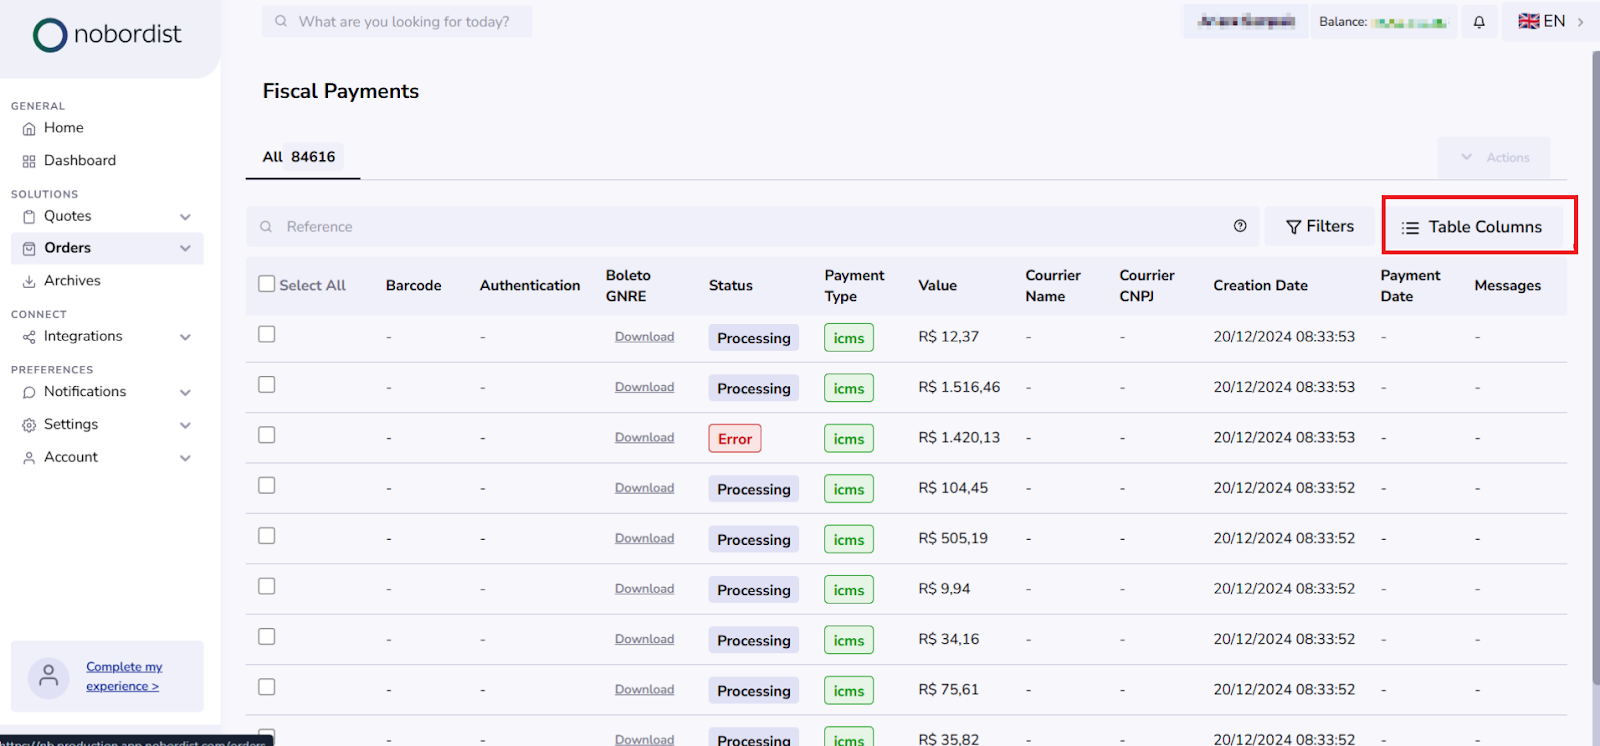
When accessing this page, you will find a table with data related to fiscal payments. To facilitate navigation and customize the displayed information, you can use the filter and column tools, detailed in the following sections.
Additionally, the table includes a Status column that indicates the current state of each fiscal payment. The Status can vary across different categories, such as:
- Processing (Order not yet paid)
- Processed (Order paid)
- Error (Payment attempt failed).
This allows you to quickly identify the current status of payments, helping you organize and prioritize actions as needed.
3.How to Use Column Editing

The "Table Columns" feature allows you to customize the information displayed in the "Fiscal Payments" table. Follow the steps below:
Accessing the Configuration:
Click on the "Table Columns" button located at the top of the table.
Changing Visibility:
In the window that opens, you will see two sections: "Shown Columns" and "Hidden Columns."
- Use the eye icon next to each column to show or hide information.
Reorganizing Columns:
Drag and drop the columns in the desired order within the "Shown Columns" section.
Quick Actions:
- Click "Select All Columns" to display all columns at once.
- Use "Deselect All Columns" to hide everything quickly.
Finalizing:
Once you’ve made the adjustments, close the window to apply the changes.
This functionality is useful for customizing the display according to your needs, highlighting only the most relevant data.
4.How to Use the Filter Option

The filter functionality allows you to locate specific information within the "Fiscal Payments" table. Here's how to use it:
Opening the Filters:
Click on the "Filters" button located at the top of the table.
Selecting a Criterion:
Choose the desired field from the dropdown menu, such as "Payment Date," "Amount," or "Courier Name."
Defining a Value:
Enter the desired value or parameter for the filter.
Applying the Filter:
After setting the criterion and value, click "Confirm" to apply the filter.
Removing Filters:
Click on the trash icon to clear the current filter.
This functionality helps you focus on relevant information, making it easier to analyze the data in the table.
5. How to Use the "Actions" Option

In the fiscal payments table, you can perform actions such as downloading the invoice or fiscal payment receipt. Follow the steps below to proceed:
How to Select Items in the Table
Individual Selection:
Click on the checkboxes located on the left side of each row in the table to select specific items.
Select All Items on the Current Page:
To mark all items on the current page, click on the checkbox located at the top of the table (next to the "Select All" column).
Select All Items Across All Pages:
After selecting all items on the current page, an option will appear at the bottom of the table:
"Select all items": Click this option to mark all available items across all pages.
How to Perform Actions
After selecting the desired items, locate the "Actions" section and choose one of the available options:
- Download Fiscal Payment: Download the receipt for the fiscal payment.
- Download Invoice: Download the corresponding fiscal invoice.
Important Notes
- Actions will only be enabled after selecting at least one item.
- Ensure you have selected the correct records to avoid unnecessary downloads.


